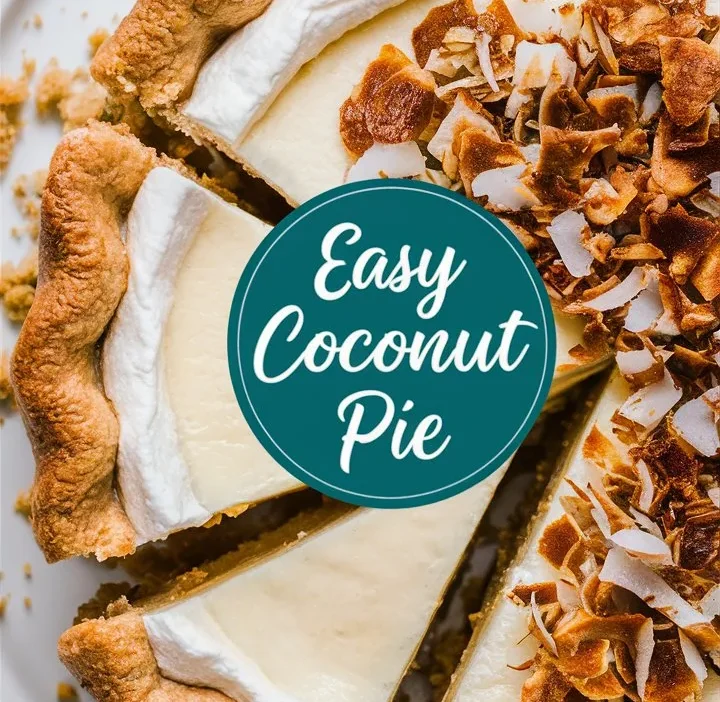
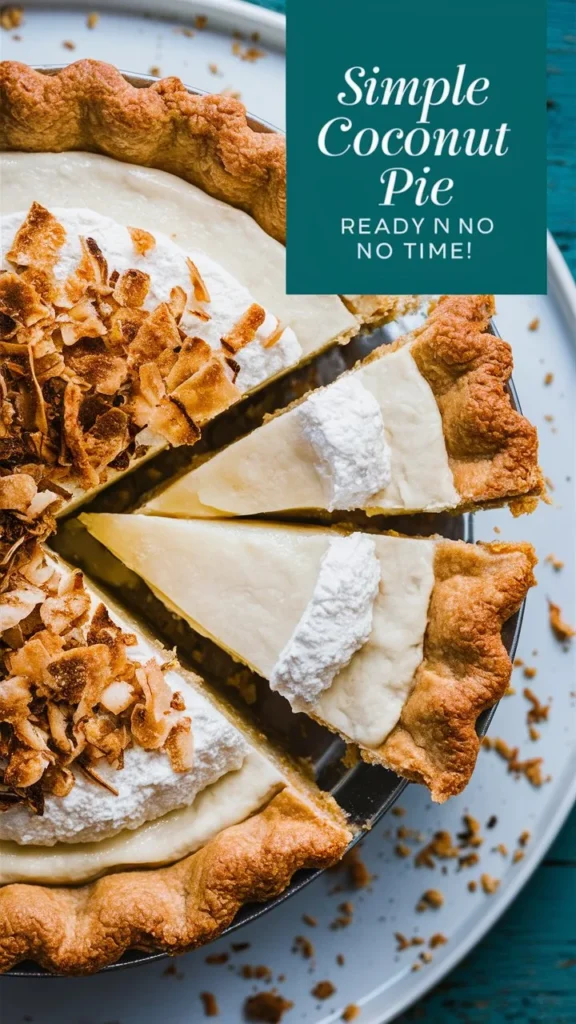
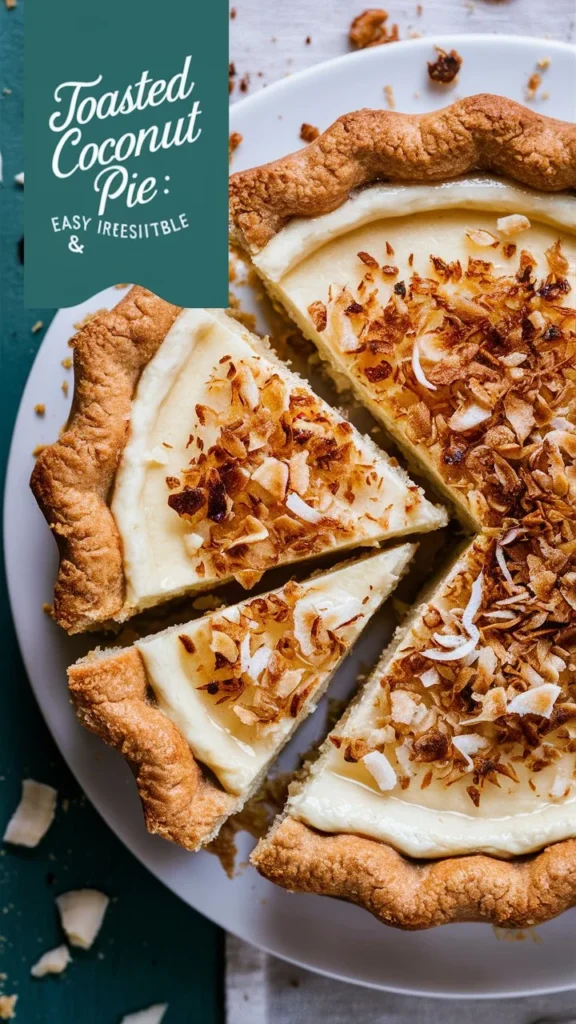
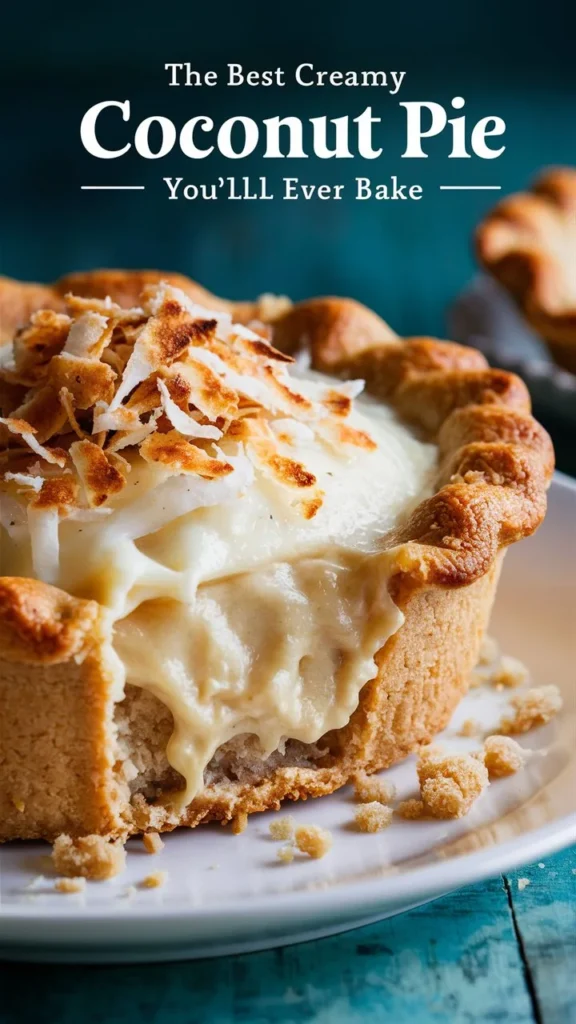
There’s something almost enchanting about a dessert that seems to defy logic — and the Coconut Magic Custard Pie is exactly that. One simple batter transforms into three distinct layers as it bakes: a firm crust at the bottom, a silky custard center, and a golden coconut-speckled top. The best part? It’s incredibly easy to make in just three main steps, requiring only basic pantry ingredients.
Whether you’re baking it for a family gathering, a holiday dessert table, or simply as a cozy treat for yourself, this pie delivers elegance with minimal effort. The coconut adds a tropical flair, making each bite sweet, creamy, and irresistible.
A Short History of Custard Pies
Custard pies trace their origins back to medieval Europe, where custard was prized for its luxurious, creamy texture. The term “custard” comes from the French word croustade, meaning a crust or tart. Early versions were baked in pastry shells and often flavored with vanilla, nutmeg, or citrus zest.
When custard pie recipes arrived in America in the 17th and 18th centuries, they evolved with regional variations. The South became famous for Chess Pie and Buttermilk Pie, while tropical areas embraced coconut custard. The “magic” style — where one batter separates into layers during baking — is a relatively modern phenomenon, becoming popular in home kitchens in the mid-to-late 20th century.
Today, coconut magic custard pie blends the nostalgia of traditional custard pies with the excitement of a self-layering dessert, creating an impressive yet beginner-friendly showstopper.
Why People Love Coconut Magic Custard Pie
- Three unique layers in one bake — crust, custard, and topping.
- No pastry-making required — the batter forms its base.
- Coconut lovers’ dream — tropical flavor meets creamy texture.
- Effortless presentation — looks fancy without extra work.
- Adaptable for holidays — perfect for Easter, Thanksgiving, or summer picnics.
Ingredients
Ingredient Measurement Purpose Unsalted butter, melted½ cup (113 g)Adds richness and helps form crustGranulated sugar 1 cup (200 g)Sweetens custardLarge eggs, room temperature4Structure and creamy textureVanilla extract 2 tsp Flavor. All-purpose flour½ cup (60 g). Helps separate layers. Whole milk, lukewarm, 2 cups (480 ml) creates a custard texture. Shredded sweetened coconut 1 cup (85 g)Tropical flavor and top layer textureSalt¼ tsp Balances sweetness.
Step-by-Step Recipe Instructions
Step 1: Prepare the Batter
- Preheat oven to 325°F (160°C). Grease a 9-inch pie dish or baking pan.
- In a large mixing bowl, whisk together the melted butter and sugar until smooth.
- Add the eggs, one at a time, whisking well after each addition. Stir in vanilla extract.
- Sift in the flour and salt, mixing until just combined.
- Slowly whisk in the lukewarm milk until the batter is thin and smooth.
Step 2: Add the Coconut
- Stir in the shredded coconut, distributing it evenly.
- Pour the batter into your prepared pie dish — it will be quite liquid. Don’t worry; the magic happens in the oven.
Step 3: Bake and Cool
- Bake for 50–60 minutes, or until the top is golden and set, but the center still has a slight jiggle.
- Let the pie cool completely — this allows the layers to finish setting.
- Slice and serve chilled or at room temperature.
The “Magic” Behind the Layers
During baking, the batter naturally separates:
- Bottom layer — flour and butter settle, forming a soft crust.
- Middle layer — milk and egg custard form a creamy filling.
- Top layer — coconut rises to the surface and turns golden.
Health Benefits of Coconut Magic Custard Pie
While this is an indulgent dessert, coconut offers some nutritional perks:
- Healthy fats from coconut can provide quick energy.
- Manganese in coconut supports bone health.
- Eggs provide protein and essential vitamins.
Expert Tips for Perfect Layers
- Use room temperature eggs for a smoother custard.
- Whisk gently to avoid too much air in the batter.
- Bake at a low temperature to ensure a slow, even setting.
- Don’t skip the cooling step — cutting too soon can collapse the layers.
Common Mistakes to Avoid
- Overbaking results in a dry custard.
- Using cold milk can cause an uneven texture.
- Skipping sifting the flour may lead to lumps.
Creative Variations
- Chocolate twist — add 2 tbsp cocoa powder to the flour.
- Citrus hint — stir in 1 tsp lemon zest for brightness.
- Nut topping — sprinkle toasted almonds or pecans over the coconut layer.
Storage & Make-Ahead Guide
Storage Method Duration Notes Room temperature Up to 8 hours Best for same-day serving Refrigerator 33–4 days Store covered to prevent drying Freezer 2 months Wrap tightly; thaw in fridge overnight.
Diet Compatibility Table
DietType Compatible?NotesVegetarian✅Contains dairy and Gluten-Free ❌Use GF flour to adaptKeto❌Too high in carbsDairy-Free❌Requires milk & butter.
FAQs
Q: Can I use unsweetened coconut? A: Yes, but you may want to increase sugar slightly for balance.
Q: How do I prevent the top from browning too quickly? A: Cover loosely with foil during the last 15 minutes of baking.
Q: Can I double the recipe? A: Yes, but use a larger dish and increase baking time by 10–15 minutes.
Nutrition Facts (Per Slice – 8 servings)
NutrientAmountCalories325Carbohydrates38 gProtein6 gFat17 gSaturated Fat11 gFiber2 gSugar27 g
Final Thoughts
The Coconut Magic Custard Pie is proof that baking doesn’t have to be complicated to be spectacular. With just a handful of ingredients and three simple steps, you can create a dessert that’s as visually impressive as it is delicious. Whether served at a casual family dinner or a festive holiday table, it’s bound to win hearts — and have everyone asking for the recipe.