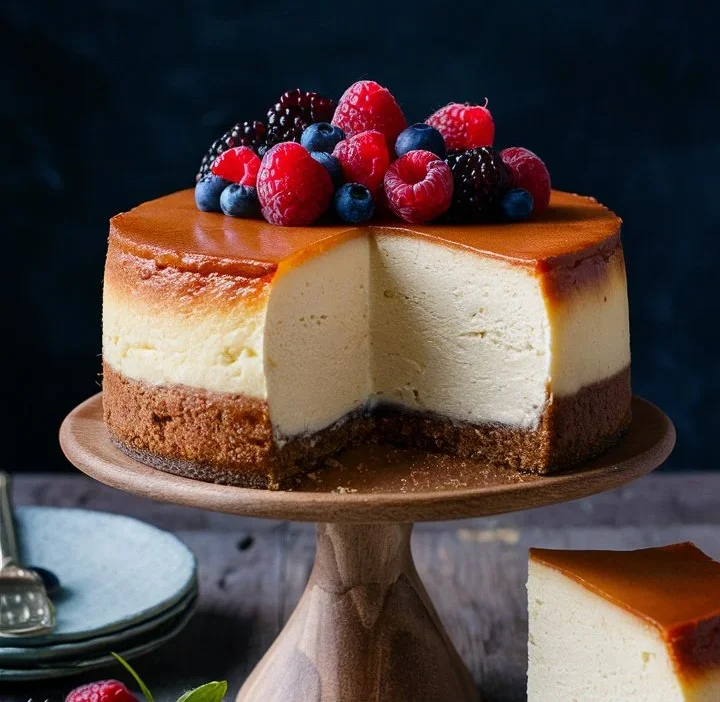
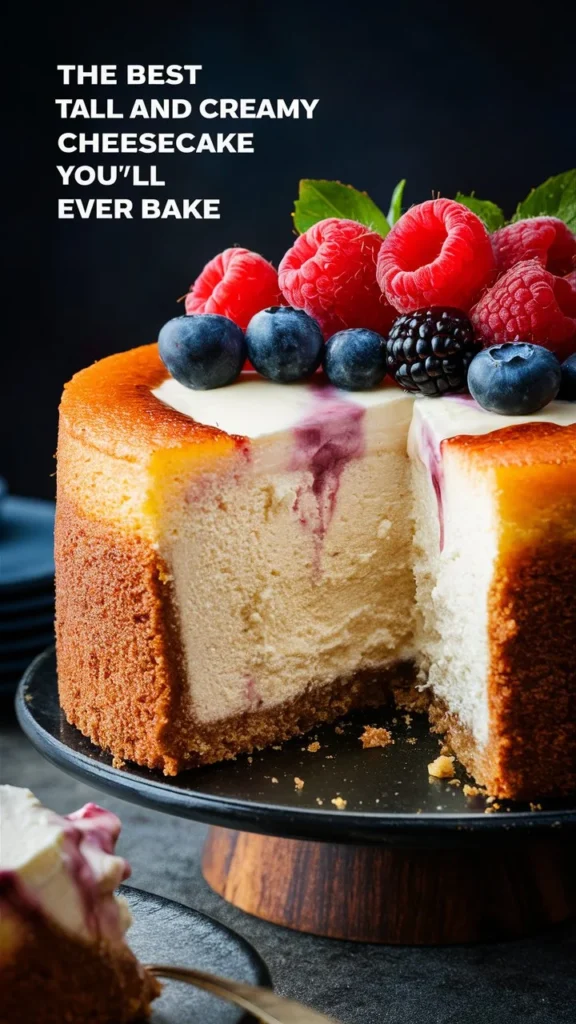
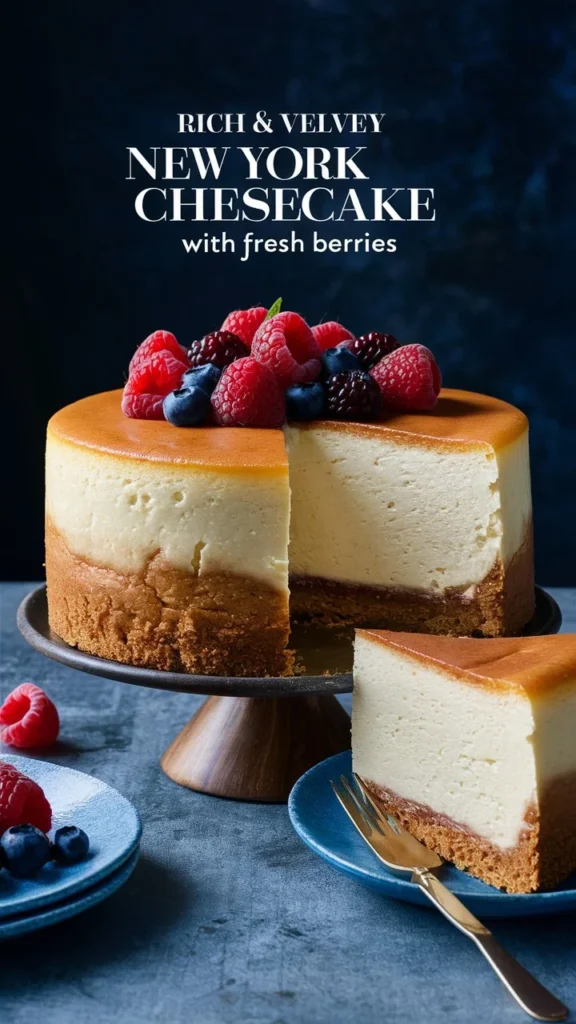
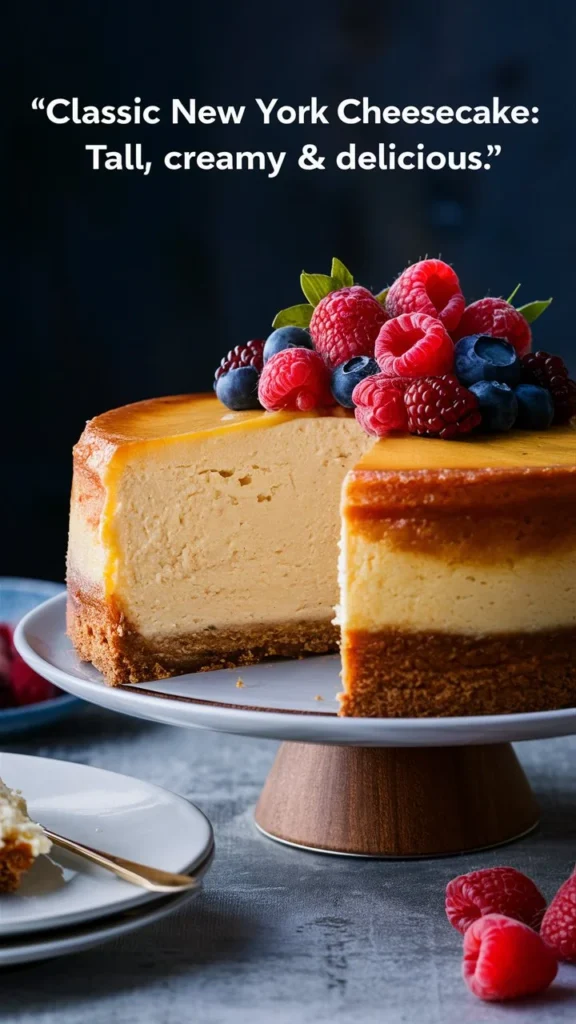
A cream cheese cake is one of those timeless desserts that never goes out of style. Known for its velvety smooth texture, subtle tang, and decadent richness, this classic recipe has stood the test of time as a favorite at birthdays, weddings, holidays, and family gatherings. Unlike overly sweet desserts, cream cheese cake strikes the perfect balance between creamy indulgence and refined flavor. It’s versatile enough to enjoy on its own, yet also works beautifully as a base for fruit toppings, chocolate drizzles, or nut garnishes.
In this guide, we’ll walk you through everything you need to know to bake the perfect cream cheese cake. From why people love it, to step-by-step instructions, expert tips, common mistakes to avoid, and fun flavor variations, this article will help you master a bakery-worthy cake in your own kitchen.
Why People Love This Cream Cheese Cake
- Irresistible Texture: Smooth, dense, yet creamy—every bite feels luxurious.
- Perfectly Balanced Flavor: Sweet but not overwhelming, with a tang from the cream cheese that elevates the taste.
- Crowd-Pleasing Dessert: Loved by both adults and kids, making it perfect for any gathering.
- Versatile Base: Can be topped with fruit compotes, whipped cream, chocolate ganache, or caramel sauce.
- Homemade Elegance: Looks impressive, but with the right steps, it’s achievable for home bakers.
- Stays Fresh Longer: Thanks to its cream cheese base, this cake retains its flavor and texture for several days when stored properly.
Ingredients Table
| Ingredient | Quantity | Purpose |
|---|---|---|
| Cream cheese (full-fat, softened) | 4 packages (8 oz each) | The star ingredient providing richness and tang. |
| Granulated sugar | 1 ½ cups | Sweetens and balances tanginess. |
| All-purpose flour | 3 tbsp | Stabilizes the batter. |
| Eggs | 4 large | Provides structure and richness. |
| Sour cream | 1 cup | Adds creaminess and slight tang. |
| Vanilla extract | 2 tsp | Enhances flavor. |
| Graham cracker crumbs | 1 ½ cups | Base crust for crunch. |
| Unsalted butter (melted) | 6 tbsp | Holds crust together. |
| Salt | ¼ tsp | Balances sweetness and enhances flavors. |
Step-by-Step Recipe: 7 Detailed Steps
Step 1: Prepare the Crust
Mix graham cracker crumbs with melted butter and a pinch of sugar. Press the mixture firmly into the bottom of a springform pan. Chill in the refrigerator for 15 minutes to set while you prepare the filling.
Step 2: Beat the Cream Cheese
Using a stand mixer or hand mixer, beat softened cream cheese until smooth and creamy. Scrape the sides of the bowl often to avoid lumps.
Step 3: Add Sugar and Flour
Gradually add sugar and flour, beating at low speed until fully incorporated. This ensures sweetness is evenly distributed and helps prevent cracks.
Step 4: Incorporate Eggs One by One
Add eggs one at a time, mixing gently after each addition. Over-beating can introduce too much air, which causes cracks during baking.
Step 5: Add Sour Cream and Vanilla
Fold in sour cream and vanilla extract for added richness and depth of flavor. The batter should now be silky smooth.
Step 6: Bake in a Water Bath
Pour the batter onto the prepared crust. Place the springform pan in a larger roasting pan and add hot water halfway up the sides. Bake at 325°F (160°C) for 60–70 minutes until the edges are set but the center jiggles slightly.
Step 7: Cool and Chill
Turn off the oven, crack the door, and let the cake cool slowly to prevent cracks. Chill for at least 4 hours (preferably overnight) before serving.
Expert Tips for Success
- Always use room-temperature cream cheese for a smooth batter.
- Do not overbeat the eggs; mix just until combined.
- Use a water bath to avoid cracks and ensure even baking.
- Chill overnight for the best texture and flavor.
- Run a thin knife around the cake edges immediately after baking to prevent sticking.
Common Mistakes to Avoid
- Cold cream cheese: Leads to a lumpy batter.
- Skipping the water bath increases the chances of cracks.
- Over-baking: Makes the cake dry; remove when the center still jiggles slightly.
- Not chilling long enough: Results in a cake that hasn’t fully set.
- Cutting too soon: Always chill before slicing for clean cuts.
Flavor Variations to Try
- Berry Swirl: Add raspberry or blueberry puree before baking.
- Chocolate Marble: Swirl in melted chocolate for a rich twist.
- Citrus Delight: Add lemon or orange zest to the batter.
- Nutty Crunch: Top with crushed pecans or almonds.
- Caramel Drizzle: Add a layer of salted caramel sauce on top before serving.
Nutritional Insights (per slice, approx.)
| Calories | Carbs | Protein | Fat | Sugar |
|---|---|---|---|---|
| 420 | 32g | 7g | 29g | 25g |
FAQs About Cream Cheese Cake
Q1: Can I make this cake without a water bath?
Yes, but the risk of cracks increases. A water bath ensures even baking.
Q2: Can I use low-fat cream cheese?
Not recommended. It alters the texture and flavor.
Q3: How long can I store cream cheese cake?
Up to 5 days in the fridge or 2 months frozen (well wrapped).
Q4: How do I get clean slices?
Use a sharp knife dipped in hot water, wiping between each cut.
Q5: Can I bake this ahead of time?
Yes! Cheesecake tastes better when made a day ahead.
Q6: Why did my cheesecake crack?
Over-baking or skipping the water bath are common causes.
Q7: Can I add toppings before chilling?
Wait until after chilling to add toppings to prevent sogginess.
Q8: Can I use a regular cake pan?
It’s best to use a springform pan for easy release.
Final Thoughts
A cream cheese cake is a timeless dessert that combines simplicity with elegance. With its velvety texture, balanced sweetness, and endless flavor variations, it’s a treat that always impresses. By following the steps and expert tips above, you can create a bakery-quality cake right in your own kitchen—perfect for celebrations or simply indulging yourself.